
![[OAuth2.0] 카카오 로그인 (백엔드 테스팅 버젼)](https://img1.daumcdn.net/thumb/R750x0/?scode=mtistory2&fname=https%3A%2F%2Fblog.kakaocdn.net%2Fdna%2FxQIYT%2FbtrXwiDA45d%2FAAAAAAAAAAAAAAAAAAAAAAXdkrfqNuPZuLwULZbeLX3myeWZuwVuWGX22G_OeZhi%2Fimg.jpg%3Fcredential%3DyqXZFxpELC7KVnFOS48ylbz2pIh7yKj8%26expires%3D1772290799%26allow_ip%3D%26allow_referer%3D%26signature%3DgesAqLjQcwwVth399pZFVcDSTEY%253D)
목적
: 이 페이지는 카카오로그인 구현시 타임리프 없이 카카오 로그인 통신 및 로그인 플로우가 정상적으로 돌아가는 지 확인하기 위함.
* 프론트와 맞춰서 하는 경우의 Spring 코드는 아래 2번 글 참고
[Oauth2.0] 카카오 로그인 (프론트엔드 브라우저 연동 버젼) : https://radpro.tistory.com/522
사전 준비
: 카카오 Developer에서 앱 등록 (https://developers.kakao.com/docs/latest/ko/kakaologin/prerequisite)
: 카카오 Developer에서 필요한 profile 및 동의 항목 설정
: 내 애플리케이션에서 플랫폼 -> Web에 도메인 URI 등록하기
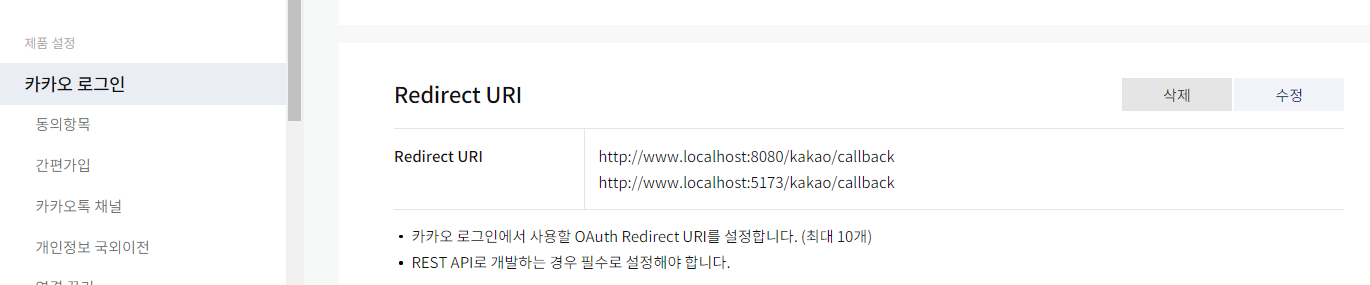
: 카카오 로그인에서 Redirect URI 등록해두기
: APP Key는 App Id가 아닌 REST API 키를 사용하기
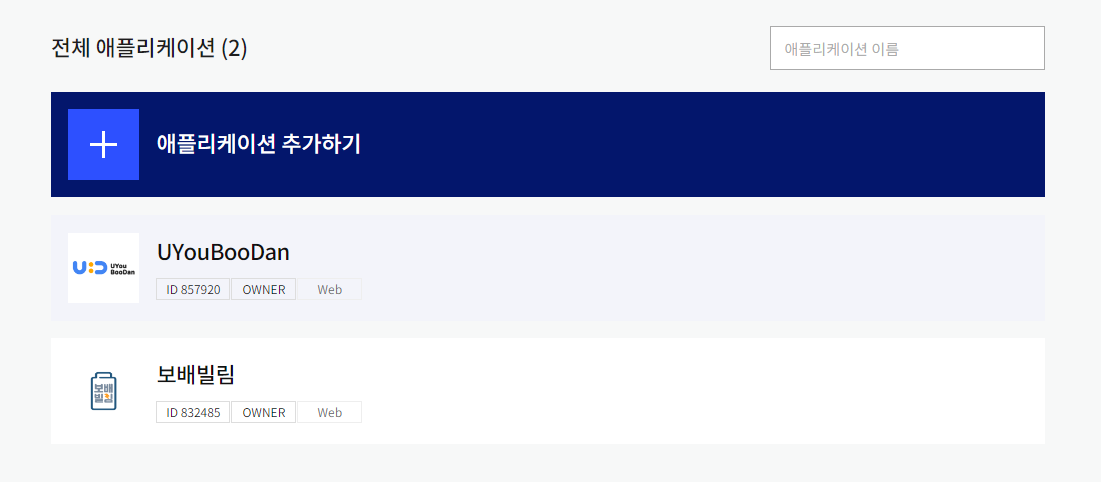
애플리케이션 추가 하는 곳 (상단의 내 애플리케이션 탭을 통해 접근)

구현 전, 공식문서 가볍게 훑고가기
1. 카카오 로그인 과정 : 프론트와 백엔드가 해야 할 부분을 훑고가기

2. 인가 Code 받기 API
: 즉, GET 요청으로, Host경로에, GET 경로를 붙여서, 본인의 REST_API_KEY와 원하는 REDIECT_URI를 넣어 요청하면 된다는 뜻
1) 공식 API ( 사전 설정은 링크 참고 : 공식 문서 중 code 부분 )
GET /oauth/authorize?client_id=${REST_API_KEY}&redirect_uri=${REDIRECT_URI}&response_type=code HTTP/1.1
Host: kauth.kakao.com
2) 예시 URI 및 사용 예시 코드
https://kauth.kakao.com/oauth/authorize?client_id={APP_KEY}&redirect_uri=http://www.localhost:8080/kakao/callback&response_type=code@RestController @RequestMapping("/kakao")
public class KakaoOauthController {
@Getter
@Value("${oauth.kakao.appKey.restApiKey}")
private String kakaoAppKey;
@GetMapping("/oauth")
public String kakaoConnect() {
StringBuffer url = new StringBuffer();
url.append("https://kauth.kakao.com/oauth/authorize?");
url.append("client_id=" + getKakaoAppKey()); // App Key
url.append("&redirect_uri=http://www.localhost:8080/kakao/callback"); // 경로 확인 (아래 핸들러 메소드?)
url.append("&response_type=code");
return "redirect: " + url;
}
}
3. 인증 Token 받기 (Kakao AccessToken & RefreshToken)
: 여기서 조심할 점은 Content-type이 JSON이 아닌 x-www.form-urlencoded;charset=utf-8 방식이라는 것
1) 공식 API : ( 사전 설정은 링크 참고 : 공식 문서 중 Token 부분 )
POST /oauth/token HTTP/1.1
Host: kauth.kakao.com
Content-type: application/x-www-form-urlencoded;charset=utf-8
2) 사용 예시 코드
@GetMapping("/callback")
public String kakaoLogin(@RequestParam("code") String code, HttpServletResponse response) throws JsonProcessingException {
    RestTemplate restTemplate = new RestTemplate();
    HttpHeaders kakaoTokenReqHeaders = new HttpHeaders(); // springFramework.http 라이브러리
    kakaoTokenReqHeaders.add("Content-type", "application/x-www-form-urlencoded;charset=utf-8"); // json이 아니다 (카카오 REST API 참고)

    MultiValueMap<String, String> params = new LinkedMultiValueMap<>();
    params.add("grant_type", "authorization_code");
    params.add("client_id", getKakaoAppKey());
    params.add("redirect_url", "http://localhost:8080"); // redirect url 확인하기
    params.add("code", code);

    HttpEntity<MultiValueMap<String, String>> kakaoTokenRequest =
            new HttpEntity<>(params, kakaoTokenReqHeaders);

    // fetching for token
    ResponseEntity<String> oauthTokenResponse = restTemplate.exchange(
            "https://kauth.kakao.com/oauth/token",
            HttpMethod.POST,
            kakaoTokenRequest,
            String.class
    );
    ...
}
4. 유저 Profile 받아오기
: 필요한 프로필정보는 사전에 미리 카카오 Developer 어플리케이션 설정에서 수집동의 설정을 해두자
1) 공식 API : ( 사전 설정은 링크 참고 : 공식 문서 중 기본정보 부분 )
GET/POST /v2/user/me HTTP/1.1
Host: kapi.kakao.com
Authorization: Bearer ${ACCESS_TOKEN}/KakaoAK ${APP_ADMIN_KEY}
Content-type: application/x-www-form-urlencoded;charset=utf-8
2) 사용 예시 코드
    @GetMapping("/callback")
    public String kakaoLogin(@RequestParam("code") String code, HttpServletResponse response) throws JsonProcessingException {
        ...
        // kakao token converting process
        ObjectMapper objectMapper = new ObjectMapper();
        KakaoToken kakaoToken = null;
        try { kakaoToken = objectMapper.readValue(oauthTokenResponse.getBody(), KakaoToken.class); }
        catch (JsonMappingException je) { je.printStackTrace(); }

        RestTemplate restTemplate2 = new RestTemplate();
        HttpHeaders userDetailsReqHeaders = new HttpHeaders();
        userDetailsReqHeaders.add("Authorization", "Bearer " + kakaoToken.getAccess_token());
        userDetailsReqHeaders.add("Content-type", "application/x-www-form-urlencoded;charset=UTF-8");
        HttpEntity<MultiValueMap<String, String>> kakaoProfileRequest = new HttpEntity<>(userDetailsReqHeaders);

        // fetching for profile data
        ResponseEntity<String> userDetailsResponse = restTemplate2.exchange(
                "https://kapi.kakao.com/v2/user/me",
                HttpMethod.POST,
                kakaoProfileRequest,
                String.class
        );
        ...
    }
결론 : 방법 1보단, 2번 방법을 권장한다.
(1번의 경우 오류도 있으며, apache라이브러리를 따로 추가해야 함)
방법 1. apache 라이브러리를 사용한 방법
참고 링크 : https://master-gromit.tistory.com/11?category=778440
1. Dependencies
implementation 'org.springframework.boot:spring-boot-starter-thymeleaf' // for oauth2 (dongjin)
implementation 'org.springframework.boot:spring-boot-starter-oauth2-client' // for oauth2 (dongjin)
implementation 'org.apache.httpcomponents:httpclient' // for oauth2 - BasicNameValuePair (dongjin)
2. Controller
package TeamBigDipper.UYouBooDan.global.oauth2.kakao;

import com.fasterxml.jackson.databind.JsonNode;
import com.fasterxml.jackson.databind.ObjectMapper;
import lombok.Getter;
import org.apache.http.HttpResponse;
import org.apache.http.NameValuePair;
import org.apache.http.client.ClientProtocolException;
import org.apache.http.client.HttpClient;
import org.apache.http.client.entity.UrlEncodedFormEntity;
import org.apache.http.client.methods.HttpPost;
import org.apache.http.impl.client.HttpClientBuilder;
import org.apache.http.message.BasicNameValuePair;
import org.springframework.beans.factory.annotation.Value;
import org.springframework.ui.Model;
import org.springframework.web.bind.annotation.*;
import org.springframework.web.servlet.mvc.support.RedirectAttributes;

import javax.servlet.http.HttpServletResponse;
import javax.servlet.http.HttpSession;
import java.io.IOException;
import java.io.UnsupportedEncodingException;
import java.util.ArrayList;
import java.util.List;

@RestController
@RequestMapping("/kakao")
public class kakaoOauthController {

    @Getter @Value("${oauth.kakao.appKey.restApiKey}")
    private String kakaoAppKey;

    @Getter @Value("${oauth.kakao.clientId}")
    private String kakaoClientId;


    @GetMapping("/oauth")
    public String kakaoConnect() {
        StringBuffer url = new StringBuffer();
        url.append("https://kauth.kakao.com/oauth/authorize?");
        url.append("client_id=" + getKakaoClientId()); // client Id
        url.append("&redirect_uri=http://localhost:8080/kakao/callback"); // 경로 확인 (아래 핸들러 메소드?)
        url.append("&response_type=code");
        return "redirect: " + url.toString(); // toString 불필요?
    }

    @RequestMapping(value = "/callback", produces = "application/json", method = {RequestMethod.GET, RequestMethod.POST})
    public String kakaoLogin (@RequestParam("code") String code, RedirectAttributes redirectAttributes,
                              HttpSession session, HttpServletResponse response, Model model) throws IOException {

        System.out.println("kakao code: " + code);
        JsonNode access_token = getKakaoAccessToken(code);

        return access_token.toString();
    }


    public JsonNode getKakaoAccessToken(String code) throws IOException {

        final String RequestUrl = "https//kauth.kakao.com/oauth/token"; // host
        final List<NameValuePair> postParams = new ArrayList<>(); // apach.http 라이브러리를 사용해야함

        postParams.add(new BasicNameValuePair("grant_type", "authorization_code"));
        postParams.add(new BasicNameValuePair("client_id", getKakaoAppKey()));  // REST API KEY
        postParams.add(new BasicNameValuePair("redirect_uri", "http://localhost:8080/kakao/callback")); // redirect될 URI
        postParams.add(new BasicNameValuePair("code", code)); // 로그인 과정에서 얻은 code 밸류

        final HttpClient client = HttpClientBuilder.create().build(); // apach.http 라이브러리를 사용해야함
        final HttpPost post = new HttpPost(RequestUrl); // apach.http 라이브러리를 사용해야함

        JsonNode returnNode = null;

        try {

            post.setEntity(new UrlEncodedFormEntity(postParams));

            final HttpResponse response = client.execute(post);
            final int responseCode = response.getStatusLine().getStatusCode();

            System.out.println("\nSending 'POST' request to URL: " + RequestUrl); // 로그 확인용 (없어도 무방)
            System.out.println("Post parameters: " + postParams);
            System.out.println("Response code: " + responseCode);

            ObjectMapper mapper = new ObjectMapper();
            returnNode = mapper.readTree(response.getEntity().getContent());

        } catch (UnsupportedEncodingException | ClientProtocolException ue) {
            ue.printStackTrace();
        }

        return returnNode;
    }

}
3. KakaoUserInfo 클래스
import com.fasterxml.jackson.databind.JsonNode;
import com.fasterxml.jackson.databind.ObjectMapper;
import org.apache.http.HttpEntity;
import org.apache.http.HttpResponse;
import org.apache.http.client.ClientProtocolException;
import org.apache.http.client.HttpClient;
import org.apache.http.client.methods.HttpPost;
import org.apache.http.impl.client.HttpClientBuilder;
import org.apache.http.util.EntityUtils;
import org.slf4j.Logger;
import org.slf4j.LoggerFactory;

import java.io.IOException;

public class KakaoUserInfo {

    public static JsonNode getKakaoUserInfo(JsonNode accessToken) throws IOException {
        Logger logger = LoggerFactory.getLogger(KakaoUserInfo.class);
        final String requestUrl = "https://kapi.kakao.com/v2/user/me";
        final HttpClient client = HttpClientBuilder.create().build();
        final HttpPost post = new HttpPost(requestUrl);

        post.addHeader("Authorization", "Bearer " + accessToken); //토큰으로 인가권한 얻는 것

        JsonNode returnNode = null;

        try {
            final HttpResponse response = client.execute(post);
            final int responseCode = response.getStatusLine().getStatusCode();
            final String message = response.getStatusLine().getReasonPhrase();

            System.out.println("\nSending 'POST' request to URL: " + requestUrl);
            System.out.println("Response Code: " + responseCode);
            System.out.println("Response Code: " + message);

            // 오류시, 오류 확인용 코드
            HttpEntity entity = response.getEntity();
            String responseString = EntityUtils.toString(entity, "UTF-8");
            logger.info("responseString ----> " + responseString);

            // Json 형태 반환값 처리
            ObjectMapper mapper = new ObjectMapper();
            returnNode = mapper.readTree(response.getEntity().getContent());

        } catch (ClientProtocolException ce) {
            ce.printStackTrace();
        }

        return returnNode;

    }
}
방법 2. SpringFramework 자체 라이브러리를 사용한 방법 1
1. Controller
1) kakaoConnect 메소드
: 프론트로부터 요청을 받은 후 kakao 인증 code를 발급 받기 위한 리다이렉트 URL을 반환
-> 리다이렉트 url을 이용해 유저가 인증을 받으면 다음 메소드를 자동 호출하도록 구성되어있음
2) kakaoLogin 메소드
: 카카오로부터 요청받는 메소드. 인증 code를 파라미터로 받음
-> 이 코드를 이용해 kakaoToken을 발급받기 위한 API를 호출함
-> 발급받은 kakoToken을 이용해 kakao에 있는 유저 profile 정보를 얻는 API를 호출함
-> 얻은 profile 정보로 본인의 서비스 서버에서 회원(Member)객체를 생성 (이는 memberService에 위임)
-> 생성한 회원 Authentication을 SecurityContextHolder에 영속화 시킴 (본인 서비스 서버의 Security 검증을 위함)
-> 본인 서비스의 JWT와 Refresh토큰을 발급하여 응답 헤더에 넣고 반환 (브라우저 콘솔창에서 확인 가능)
package TeamBigDipper.UYouBooDan.global.oauth2.kakao;

import TeamBigDipper.UYouBooDan.global.security.jwt.JwtTokenizer;
import TeamBigDipper.UYouBooDan.member.entity.Member;
import TeamBigDipper.UYouBooDan.member.service.MemberService;
import com.fasterxml.jackson.core.JsonProcessingException;
import com.fasterxml.jackson.databind.JsonMappingException;
import com.fasterxml.jackson.databind.ObjectMapper;
import lombok.Getter;
import lombok.RequiredArgsConstructor;
import org.springframework.beans.factory.annotation.Value;
import org.springframework.http.*;
import org.springframework.security.authentication.UsernamePasswordAuthenticationToken;
import org.springframework.security.core.Authentication;
import org.springframework.security.core.context.SecurityContextHolder;
import org.springframework.util.LinkedMultiValueMap;
import org.springframework.util.MultiValueMap;
import org.springframework.web.bind.annotation.*;
import org.springframework.web.client.RestTemplate;

import javax.servlet.http.HttpServletResponse;

@RequiredArgsConstructor
@RestController
@RequestMapping("/kakao")
public class KakaoOauthController {

    @Getter
    @Value("${oauth.kakao.appKey.restApiKey}")
    private String kakaoAppKey;
    @Getter
    @Value("${oauth.kakao.initialKey}")
    private String initialKey;
    private final MemberService memberService;
    private final JwtTokenizer jwtTokenizer;


    /**
     * 프론트 요청 API : 인증 code 받기용
     * @return redirect url for kakao Authorization
     */
    @GetMapping("/oauth")
    public String kakaoConnect() {
        StringBuffer url = new StringBuffer();
        url.append("https://kauth.kakao.com/oauth/authorize?");
        url.append("client_id=" + getKakaoAppKey()); // App Key
        url.append("&redirect_uri=http://www.localhost:8080/kakao/callback"); // 경로 확인 (아래 핸들러 메소드?)
        url.append("&response_type=code");

        return "redirect: " + url;
    }


    /**
     * 카카오 callback API : 토큰 발급 및 서비스 멤버 생성
     * @param code 카카오 인증 code
     * @return Success Login message
     * @throws JsonProcessingException
     */
    @GetMapping("/callback")
    public String kakaoLogin(@RequestParam("code") String code, HttpServletResponse response) throws JsonProcessingException {
        RestTemplate restTemplate = new RestTemplate();
        HttpHeaders kakaoTokenReqHeaders = new HttpHeaders(); // springFramework.http 라이브러리
        kakaoTokenReqHeaders.add("Content-type", "application/x-www-form-urlencoded;charset=utf-8"); // json이 아니다 (카카오 REST API 참고)

        MultiValueMap<String, String> params = new LinkedMultiValueMap<>();
        params.add("grant_type", "authorization_code");
        params.add("client_id", getKakaoAppKey());
        params.add("redirect_url", "http://localhost:8080"); // redirect url 확인하기
        params.add("code", code);

        HttpEntity<MultiValueMap<String, String>> kakaoTokenRequest =
                new HttpEntity<>(params, kakaoTokenReqHeaders);

        // fetching for token
        ResponseEntity<String> oauthTokenResponse = restTemplate.exchange(
                "https://kauth.kakao.com/oauth/token",
                HttpMethod.POST,
                kakaoTokenRequest,
                String.class
        );

        // kakao token converting process
        ObjectMapper objectMapper = new ObjectMapper();
        KakaoToken kakaoToken = null;
        try { kakaoToken = objectMapper.readValue(oauthTokenResponse.getBody(), KakaoToken.class); }
        catch (JsonMappingException je) { je.printStackTrace(); }

        RestTemplate restTemplate2 = new RestTemplate();
        HttpHeaders userDetailsReqHeaders = new HttpHeaders();
        userDetailsReqHeaders.add("Authorization", "Bearer " + kakaoToken.getAccess_token());
        userDetailsReqHeaders.add("Content-type", "application/x-www-form-urlencoded;charset=UTF-8");
        HttpEntity<MultiValueMap<String, String>> kakaoProfileRequest = new HttpEntity<>(userDetailsReqHeaders);

        // fetching for profile data
        ResponseEntity<String> userDetailsResponse = restTemplate2.exchange(
                "https://kapi.kakao.com/v2/user/me",
                HttpMethod.POST,
                kakaoProfileRequest,
                String.class
        );

        // kakao profile converting process
        ObjectMapper objectMapper2 = new ObjectMapper();
        KakaoProfile kakaoProfile = null;
        try { kakaoProfile = objectMapper2.readValue(userDetailsResponse.getBody(), KakaoProfile.class); }
        catch (JsonMappingException je) { je.printStackTrace(); }

        // 서비스 회원 등록 위임
        Member kakaoMember = memberService.createKakaoMember(kakaoProfile);

        // 시큐리티 영역
        // Authentication 을 Security Context Holder 에 저장
        Authentication authentication = new UsernamePasswordAuthenticationToken(kakaoMember.getEmail(), kakaoMember.getPassword()); // password 확인
        SecurityContextHolder.getContext().setAuthentication(authentication);

        // 자체 JWT 생성 및 HttpServletResponse 의 Header 에 저장 (클라이언트 응답용)
        // JwtAuthenticationFilter 의 SuccessAuthenticate 메소드 사용가능한지 리팩토링 테스트 진행해보기
        String accessToken = jwtTokenizer.delegateAccessToken(kakaoMember);
        String refreshToken = jwtTokenizer.delegateRefreshToken(kakaoMember);
        response.setHeader("Authentication", "Bearer " + accessToken);
        response.setHeader("RefreshToken", refreshToken);

        return "Success Login: User";
    }
}
2. KakaoToken 클래스
: 카카오 code를 이용해 Token을 발급받기 위한 클래스
package TeamBigDipper.UYouBooDan.global.oauth2.kakao;

import lombok.Data;

@Data
public class KakaoToken {
    private String access_token;
    private String token_type;
    private String refresh_token;
    private int expires_in;
    private String Scope;
    private int refresh_token_expires_in;
}
3. KakaoProfile 클래스
: kakaoToken을 이용해 kakao에서 받을 수 있는 유저 profile정보를 얻기 위한 클래스
* 단, email, nickname 등 동의가 필요한 항목은 카카오 Developer에서 따로 동의항목에 추가해야 함.
package TeamBigDipper.UYouBooDan.global.oauth2.kakao;

import lombok.Data;

@Data
public class KakaoProfile {
    private Long id;
    private String connected_at;
    private Properties properties;
    private KakaoAccount kakao_account;

    @Data
    public class Properties {
        private String nickname;
        public String profile_image;
        public String thumbnail_image;
    }

    @Data
    public class KakaoAccount {
        private Boolean profile_needs_agreement;
        private Boolean profile_nickname_needs_agreement;
        private Profile profile;
        private Boolean has_email;
        private Boolean email_needs_agreement;
        public Boolean is_email_valid;
        public Boolean is_email_verified;
        public String email;

        @Data
        public class Profile {
            private String nickname;
            public String thumbnail_image_url;
            public String Profile_image_url;
        }
    }
}
4. MemberService 내 createKakaoMember 메소드
: Controller에서 Member 객체 생성을 위해 만든 서비스 메소드
: 도메인 모델 설계상 Member 엔티티에 구현 후 호출하는 메소드들이 있음.
ex) defaultProfile() 등. 맨 아래 레퍼런스 코드 참고 (Github)
@Transactional
public Member createKakaoMember (KakaoProfile kakaoProfile) {
    Optional<Member> optMember = memberRepository.findByEmail(kakaoProfile.getKakao_account().getEmail());
    if(optMember.isEmpty()) {
        Member member = Member.builder()
                .memberId(kakaoProfile.getId())
                .nickname(new Name("Mock"+ kakaoProfile.getId()))
                .password(passwordEncoder.encode(getInitialKey())) // yml을 통해 시스템 변수로 설정해둠
                .memberStatus(Member.MemberStatus.MEMBER_ACTIVE)
                .build();
        if (kakaoProfile.getKakao_account().getEmail()==null) member.modifyEmail(kakaoProfile.getId().toString()+"@uyouboodan.com");
        else member.modifyEmail(kakaoProfile.getKakao_account().getEmail());

        member.defaultProfile();
        List<String> roles = customAuthorityUtils.createRoles(member.getEmail());
        member.setRoles(roles);
        return memberRepository.save(member);
    }
    else return optMember.get();
}
5. Controller 내 SecurityContextHolder에 Authentication 영속화 다른 방식 코드
아래 코드는 1번 Controller에 있는 코드이며,
    @GetMapping("/callback")
    public String kakaoLogin(@RequestParam("code") String code, HttpServletResponse response) throws JsonProcessingException {
        ...
        // 시큐리티 영역
        // Authentication 을 Security Context Holder 에 저장
        Authentication authentication = new UsernamePasswordAuthenticationToken(kakaoMember.getEmail(), kakaoMember.getPassword()); // password 확인
        SecurityContextHolder.getContext().setAuthentication(authentication);
        ...
    }
다음과 같이 SpringSecurity 내 JwtVerificationFilter에서 사용하는 방식으로도 사용할 수 있다.
    @GetMapping("/callback")
    public String kakaoLogin(@RequestParam("code") String code, HttpServletResponse response) throws JsonProcessingException {
        ...
        Map<String, Object> claims = new HashMap<>();
        claims.put("username", kakaoMember.getEmail());
        claims.put("roles", kakaoMember.getRoles());
        setSecurityContext(claims);
	    ...
    }
    private void setSecurityContext(Map<String, Object> claims) {
        String username = claims.get("username").toString();
        List<GrantedAuthority> authorityList = customAuthorityUtils.createAuthorities((List) claims.get("roles"));
        Authentication authentication = new UsernamePasswordAuthenticationToken(username, null, authorityList);
        SecurityContextHolder.getContext().setAuthentication(authentication);
    }
발생할 수 있는 에러
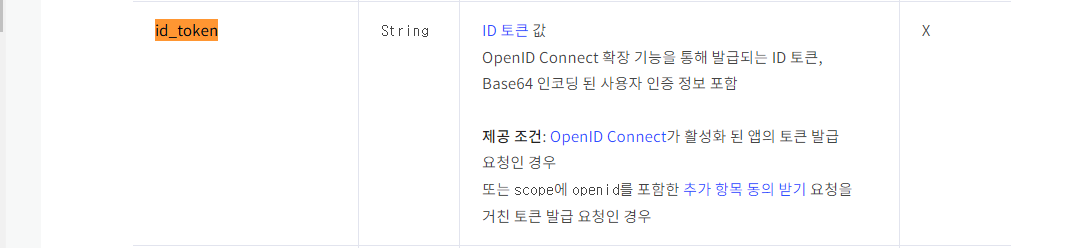
1. NullPointerException 또는 ResourceAccessException
: id_token 토큰때문에 발생했을 경우, 카카오 Developer에서 아래 설정을 on으로 해서 그렇다 (제공 조건 참고)

참고 링크
1. apache 라이브러리를 사용한 Controller 구현 : https://dkyou.tistory.com/37
2. apache 라이브러리를 사용한 Controller 구현 : https://master-gromit.tistory.com/11?category=778440
'Java & Spring > Spring' 카테고리의 다른 글
| [OAuth2.0] Google 로그인 (백엔드 테스트 버젼) (2) | 2023.02.06 |
|---|---|
| [OAuth2.0] 이론 (0) | 2023.02.06 |
| [OAuth2.0] 카카오 로그인 (프론트엔드 브라우저 연동 버젼) (0) | 2023.02.03 |
| [Spring] 비밀번호 검증 및 수정 로직 (0) | 2023.01.31 |
| [Spring] SpringSecurity - JwtTokenizer (1) | 2023.01.26 |